
Flutter + WebViews
Flutter is an amazing cross-platform framework that allows developers to build natively compiled applications for mobile, web, and desktop from a single codebase.
It is an appealing concept for all developers and businesses to not only have a shared codebase for their compiled application logic, but also to leverage their (likely) existing web presence within their mobile apps via WebViews.
The company I work for has taken advantage of this model. Being a small team with limited resources, the ability to reuse our whitelabel websites within our mobile apps has been a huge time saver. However, there are trade-offs to consider when using WebViews in Flutter applications.
In this post, I'll analyze the performance, usability, and best practices of using WebViews within Flutter apps, drawing from my personal experience, research and real life deployments.
I have produced dozens of Flutter apps, many leveraging websites contained in WebViews, deployed to both Android and iOS. I hope this analysis helps you make informed decisions about using WebViews in your own Flutter projects.
Why Flutter?
Mobile apps are powerful tools in any business's arsenal. They provide direct access to users, enable push notifications, and can leverage device capabilities like cameras, GPS, and sensors. They can allow businesses to have an access point for their content, directly on the user's home screen. This is powerful for engagement and retention. It is certainly more powerful than a mobile website that they must open a separate browser app for, and then remember to return to later.
However, developing and maintaining native mobile apps for multiple platforms (iOS and Android) can be resource-intensive, especially for small teams. Users will have an expectation that your app will be available on both iOS and Android, which means you either need to maintain two separate codebases, or use a cross-platform framework like Flutter.
Does your team have the ability to:
- Develop in both Kotlin and Swift? The languages, tooling and ecosystems for Android and iOS development are quite different. You need to figure out if your team has the capability to learn both languages, and also design and implement the same app twice in different toolchains! For most small businesses, this is a pipe dream and is not feasible.
- Maintain two separate apps moving forward? Building two separate apps is all well and good, but they will need maintenance and improvements. Can you commit to implementing every new feature twice? Can you commit the resources to investigate platform specific bugs and issues?
In comes a tool like Flutter...
Flutter is not a runtime, but a full UI toolkit that compiles to native code. This means that Flutter apps can achieve near-native performance and look great on any platform. The rich set of pre-built widgets and the ability to create custom designs make Flutter a joy to work with.
You can, for all intents and purposes, write your entire app using Flutter and using the Dart programming language and run it anywhere. The build targets for Flutter are extensive, including iOS, Android, Web, Windows, macOS and Linux.
Why WebViews?
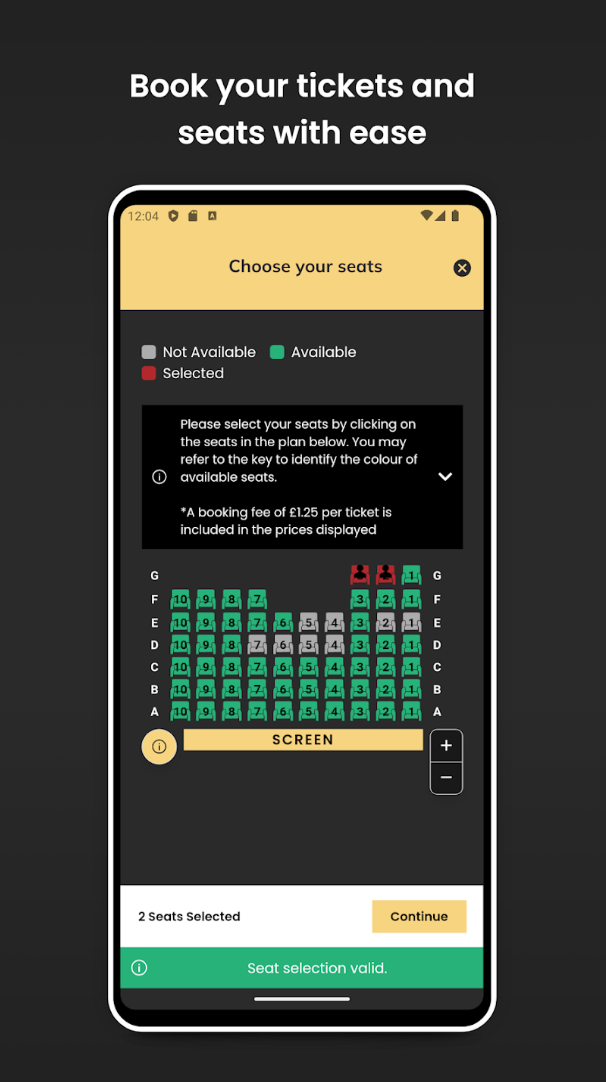
An app I made for one of our customers. Can you tell where the Flutter app ends and the website begins?
Flutter is amazing for cross platform development as we have established, but ultimately we come up to similar hurdles as we would with native development - resource constraints. Small teams often cannot afford to build fully native experiences for both iOS and Android, even with Flutter. This is where WebViews come in.
If your business already has an existing web presence, such as a website or web application, this can be easily adapted into a native feeling experience by embedding it within a WebView in your Flutter app.
There are myriad benefits to this approach:
- Logic and visual parity: Instead of developing and maintaining your web and app products separately, you can design/implement once and run everywhere. The benefits of this one feature cannot be understated for small teams.
- Instant changes and deployments: If you need to add content, make changes and so on, you can do this directly on your web platform. Your users, when they next visit the relevant page or content within your app will immediately have access to your changes! In a world where Apple and Google can take days or weeks to approve app updates, this is a huge win.
If you need a mobile app on both platforms, and you already have some kind of web engine, it is almost a no-brainer to use WebViews within Flutter. Instead of maintaining potentially 3 codebases, you are maintaining two, and if the Flutter side is done correctly then the Flutter side will require virtually zero maintenance.
The bad and the ugly
While in my view this approach is a no-brainer, that does not mean that there are not challenges and trade-offs to consider. This is the case with any technical decision.
When it comes to integrating WebViews, Flutter relies on platform-specific implementations. On Android, it uses the native WebView component, while on iOS, it uses WKWebView. This can lead to some inconsistencies in behavior and performance across platforms. This can be managed with careful testing and platform specific tweaks, but it is something to be aware of.
Additionally, WebViews can introduce performance overhead, especially if the web content is complex or not optimized for mobile devices. This can result in slower load times, increased memory usage, and a less responsive user experience. In my experience, the grand majority of mobile devices out there easily breeze through WebView content, but older or lower-end devices may struggle.
Another consideration is the user experience. WebViews may not always provide the same level of interactivity and responsiveness as native Flutter widgets. Users may notice differences in scrolling, touch gestures, and overall app responsiveness when interacting with WebView content. If you follow the right processes and optimize your web content for mobile, this can be mitigated to a large degree.
These points are worth considering. My story is of great success integrating web content inline into Flutter apps, and I have not had a single customer ever complain about performance or usability. I have also never had any customer even mention or hint that they're aware that, under the hood, they are essentially using a container for their existing websites.When done well, users simply will not notice. It will feel native.
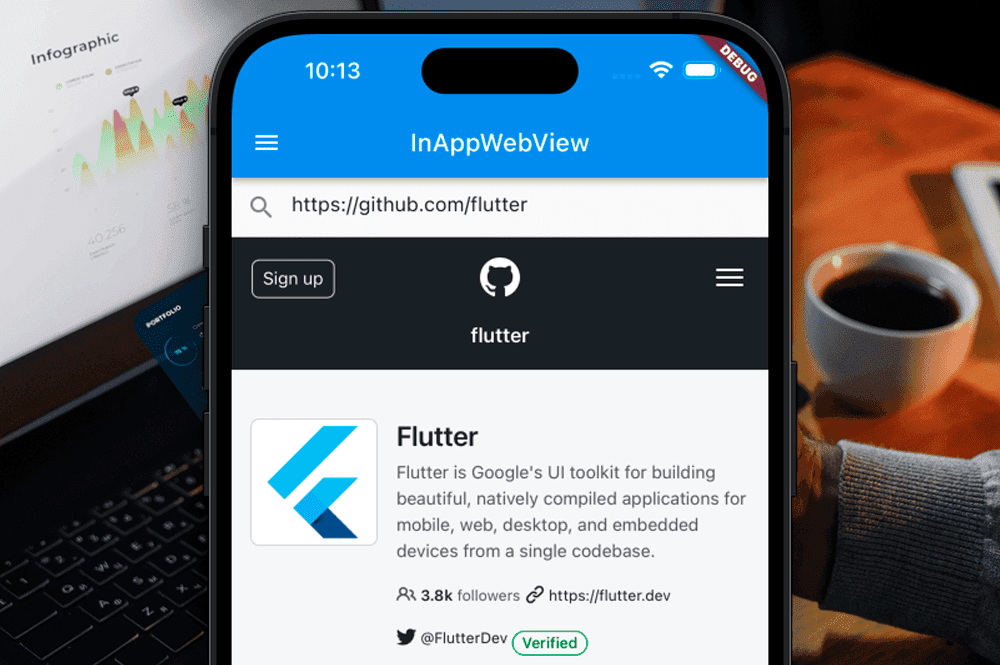
Flutter InAppWebView
Starting a new Flutter project is out of scope for this project, but guidance on implementation of web content certainly is.
The first thing you learn, like life, is that you cannot do it alone. I do not believe that utilising the individual platform WebView implementations directly is the way to go. In fact, we would defeat the purpose of using Flutter. We would have to maintain two separate WebView implementations.
Instead, I recommend using a third party package that abstracts away the platform differences and provides a unified API for working with WebViews in Flutter.
My recommendation, and it's an easy one to make, is the flutter_inappwebview package.
This package gives you a very powerful and high level API for working with each platform's WebView implementation, and also provides a consistent experience across both Android and iOS. It is also a single Flutter widget, cross-platform. You write all the code for the interop between your app and your website and you only write it once.
Key features of flutter_inappwebview
- Content Loading: Load web content from URLs or HTML strings with ease
- JavaScript Integration: Execute JavaScript and enable two-way communication between Flutter and web content
- Session Management: Handle custom headers and cookies for seamless authentication
- Navigation Control: Handle navigation events, page loading progress, and redirects
- Extensive Configuration: Support for various WebView settings and platform-specific configurations
Getting started
Install this package via pub.dev, follow the setup instructions for both Android and iOS. If you want to support Windows, Mac or Linux, follow those steps too.
Optimising the general WebView settings
After installing the flutter_inappwebview package, you can start integrating WebViews into your Flutter app.
The first thing I like to do is create my own dedicated Widget that wraps the InAppWebView widget. This allows me to encapsulate all the WebView logic and configuration in one place, making it easier to manage and reuse across different parts of my app.
This is usually tailored to the very specific purpose that we need to acheive for the project at hand. My Widget component will look different to yours, because you will have different needs and requirements.
You will want to initialise the InAppWebView with a set of settings that suit your use case. Here is an example of a settings object that I use frequently:
1final InAppWebViewSettings _settings = InAppWebViewSettings(
2    applicationNameForUserAgent: 'APP',
3    cacheEnabled: true,
4    incognito: false,
5    verticalScrollbarThumbColor: AppTheme.scrollBarColor,
6    horizontalScrollbarThumbColor: AppTheme.scrollBarColor,
7    supportZoom: false,
8    domStorageEnabled: true,
9    databaseEnabled: true,
10    allowsBackForwardNavigationGestures: false,
11    allowBackgroundAudioPlaying: false,
12    allowsInlineMediaPlayback: true,
13    javaScriptCanOpenWindowsAutomatically: true,
14    supportMultipleWindows: false,
15    sharedCookiesEnabled: false,
16    thirdPartyCookiesEnabled: true,
17    disableContextMenu: false,
18    applePayAPIEnabled: false,
19    disableLongPressContextMenuOnLinks: true,
20    allowsLinkPreview: false,
21    javaScriptEnabled: true,
22    useShouldOverrideUrlLoading: true,
23    useShouldInterceptRequest: false,
24    useHybridComposition:
25        ((app.androidSdkVersion != null) && (app.androidSdkVersion! > 28)),
26    overScrollMode: OverScrollMode.IF_CONTENT_SCROLLS,
27    underPageBackgroundColor: Colors.transparent,
28    transparentBackground: true,
29    disableDefaultErrorPage: true,
30    suppressesIncrementalRendering: true,
31  );
There are a few points to be said on the above. Firstly you can see that we're customising the colours of the scrollbar based on our app theme. Secondly you will see a lot of overrides to default behaviour, such as disabling zoom, disabling context menus and so on. These are all optimizations to make the WebView feel more like a native app experience.
These minor tweaks and optimisations go a long way to making the WebView feel like a first class citizen within your app, rather than an afterthought. When implemented this way, the WebView will feel like a native part of your app and your users will struggle to notice the difference.
Changes to your website
You will obviously need to make changes to your website to ensure it works well within the Flutter WebView. This includes:
- Ensuring your website is responsive and works well on mobile devices
- Adding support for mobile-specific features like touch gestures and device orientation
Another thing to bear in mind is that, usually, a site's header and footer are a little incompatible with a mobile app. These are likely elements that you will want tohide when in an app session and recreate natively in Flutter, having your web content render in between them. This will give a more seamless experience to your users.
Irrespective of the website's contents, I always like to have an AppBar in Flutter that contains at least a back button and the app's logo... And a BottomNavigationBar to allow easy navigation to other parts of the app/website. Again, this nativises the experience. These two little additions will make your app feel entirely native.
But how do you determine whether your website is being contained within a WebView, and not being viewed in a normal browser? I like to customise the User-Agent stringof the WebView to include a custom identifier. This way, I can have my website's code check for this identifier and adjust the UI/UX accordingly. In the section above, you will see that our custom settings object overrides the applicationNameForUserAgent property to append 'APP' to the User-Agent string.
Implementation in Flutter, and Widget design
Now you've got your settings object, that you will pass to your internal InAppWebView widget, you can start building out the implementation.
This is not a guide to a feature complete implementation, but I will share some tips and best practices that I have learned along the way.
- Use a custom loading indicator: You should use a custom loading indicator you have created in Dart, and render that on top of the InAppWebView Widget. Use the internal progress callbacks to show/animate/hide your progress bar. This will aid the user in feeling like they are getting responsive feedback from the app.
- Handle lifecycle events: You should handle all lifecycle events for the Flutter app that you can. Modern mobile operating systems have a lot of potential events like incoming calls, internet dropping, the app being sent to the background and so on. Handling these events gracefully will ensure your WebView does not end up in a broken state.
Pitfalls to avoid
Before we go, I'd like to point out some common pitfalls to avoid when using WebViews in Flutter.
Firstly you definitely want to handle the didChangeAppLifecycleState event that Flutter provides.
Since the app going to the background can put Platform Views in a very strange state, I've found the below code solves all issues relating to memory issues and long term background usage. Copy and paste it, implement it, and thank me later!
1
2void didChangeAppLifecycleState(AppLifecycleState state) async {
3 try {
4 if (Platform.isIOS && webViewController != null) {
5 final result = await webViewController!
6 .evaluateJavascript(source: "document.body != null");
7 if (result == null || result == 'false') {
8 await webViewController!.reload();
9 }
10 }
11 } catch (err) {
12 developer.log('Error reloading webview: $err');
13 }
14}Next up is refreshing the page. There is a niche discrepancy between how iOS and Android's WebViews handle refreshing that, if you want identical behaviour on both platforms, you will need to handle.
I use this refresh() method on my component to handle all refreshing. This handles the discrepancy between iOS and Android perfectly. Refreshing will work perfectly.
1Future<void> refresh() async {
2    if (defaultTargetPlatform == TargetPlatform.android) {
3      await webViewController?.reload();
4    } else if (defaultTargetPlatform == TargetPlatform.iOS) {
5      await webViewController?.loadUrl(
6        urlRequest: URLRequest(
7            url: await webViewController?.getUrl()),
8      );
9    }
10  }
Conclusion
The tech stack I've outlined in this post has served me and my team extremely well over the years. The ability to leverage existing web content within our Flutter apps has saved us countless hours of development time and resources.
We have dozens of customer apps deployed to both iOS and Android that use this exact approach. When a customer wants a logo changed, or a new feature added, we can often implement it on the web platform and have it live in the app within minutes. This is extremely powerful.
While not perfect, and there are trade-offs to consider, the benefits of using WebViews within Flutter apps for small teams and businesses are undeniable. With careful implementation and optimization, you can create a seamless and native-like experience for your users while significantly reducing development time and effort.